Быстрый старт: Перевод проектов из i2 control в i3 pro
Установка Beta Setup i3 pro на компьютер
Особенности использования проектов iRidium v2.x в Ridium Pro:
1. Были изменены параметры вызова клавиатуры. Возможно вам понадобится заново переназначить макросы и скрипты на вызов клавиатуры.
2. Новое API для динамических списков (List). Не используйте в iRidium Pro старое List API для iRidium v2.x, поддержка по нему осуществляться не будет.
Чтобы скачать Beta Setup на компьютер, пройдите по этой ссылке.
Конвертация проекта
v. i2 control в v. i3 pro
Откройте проект для i2 control в iRidium Studio. Вы увидите следующее окно.
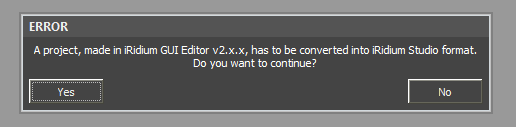
Согласитесь, чтобы продолжить работу с проектом.
Сохраните конвертированный проект.
Первый Запуск эмулятора
При первом запуске Эмулятора  вы увидите Welcome Page.
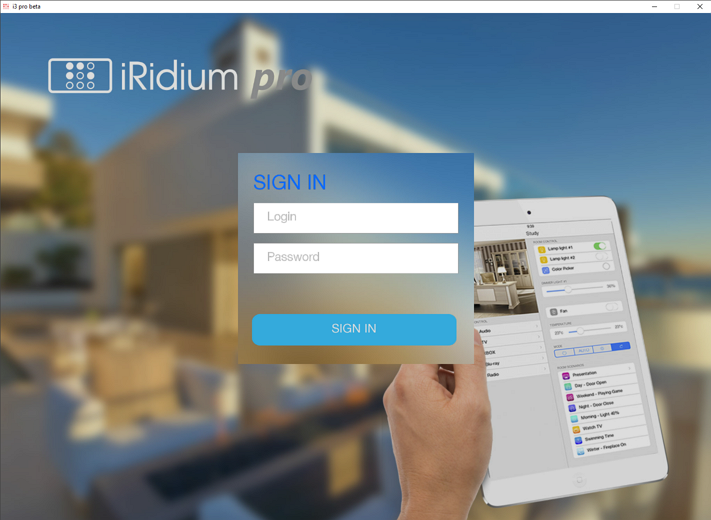
Чтобы использовать Эмулятор и, в будущем, клиент i3 pro, необходимо пройти полную регистрацию на сайте http://www.iridiummobile.ru/
При загрузке проекта визуализации в i3 pro через iRidium Transfer, или в Emulator напрямую с ПК, интегратору доступен:
- тестовый режим - 20 минут непрерывной работы. Каждые 20 минут i3 pro нужно перезагружать.
Установка i3 pro на мобильные устройства
Создание объекта на сайте
В версии i3 pro появилось понятие объекта автоматизации.
Это папка на облаке, в которой хранятся все проекты, которые относятся к одному объекту автоматизации, через него расшариваются проекты конечным пользователям, активируется тестовый период (триал лицензия на 60 дней), подбирается и покупается лицензия для этого объекта.
При загрузке проекта через iRidium Cloud, доступно три режима:
- тестовый режим - 20 минут непрерывной работы. Каждые 20 минут i3 pro нужно перезагружать. Он активируется автоматически, если в облачном объекте не начат триальный период и не куплена лицензия
- триальный период - 60 дней непрерывной работы. Его нужно активировать в настройках облачного объекта, продление тестового режима недоступно.
- лицензия, которая работает бессрочно. Если для объекта в облаке куплена лицензия, вы можете скачать и использовать проекты без ограничений (в рамках оплаченного функционала)
Чтобы добавить объект в облако, необходимо:
1. Зайдите на наш сайт под своим логином и паролем.
2. Перейдите во вкладку My Account
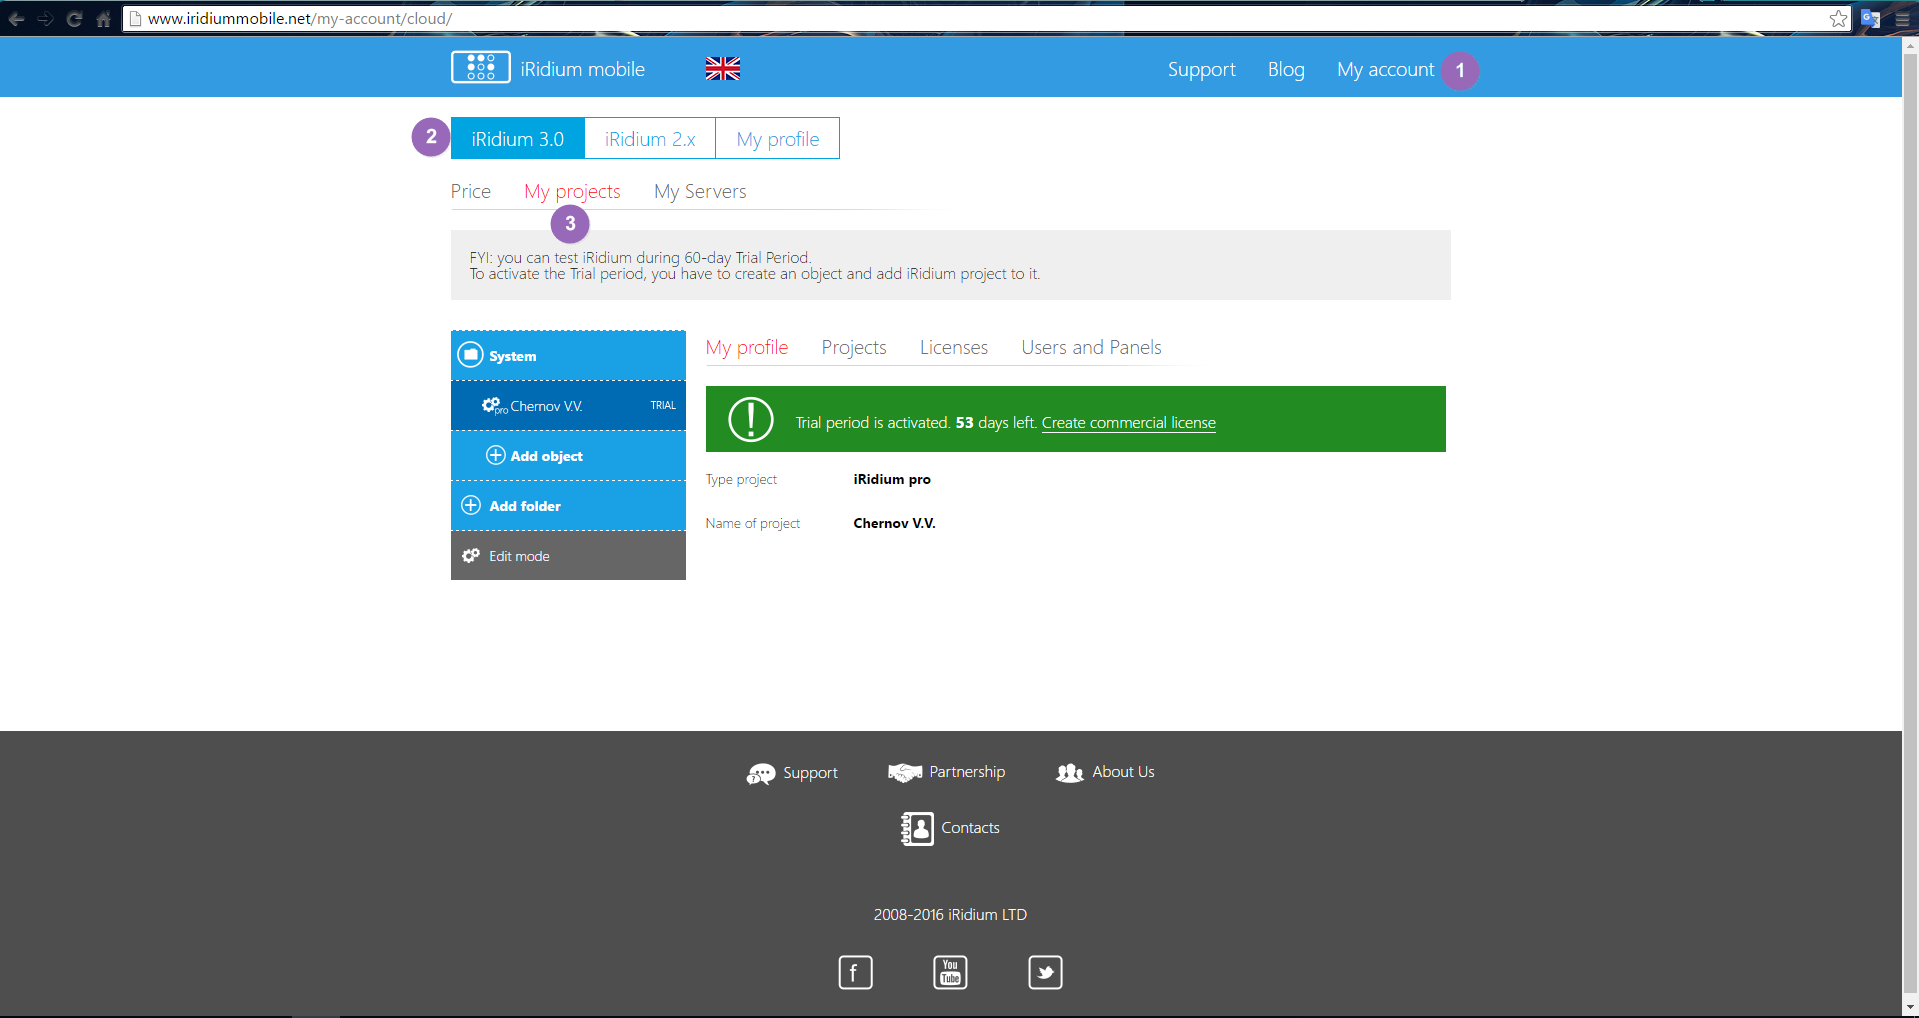
3. Чтобы добавить объект, нажмите на иконку "Add object"
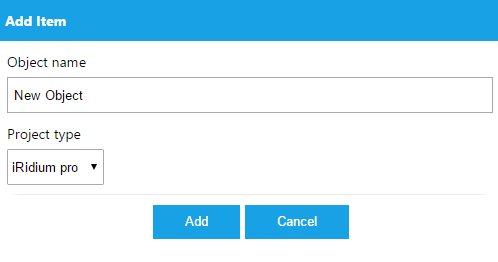
4. Введите имя объекта и выберите, какого типа проекты он будет содержать (нас интересует i3 pro).
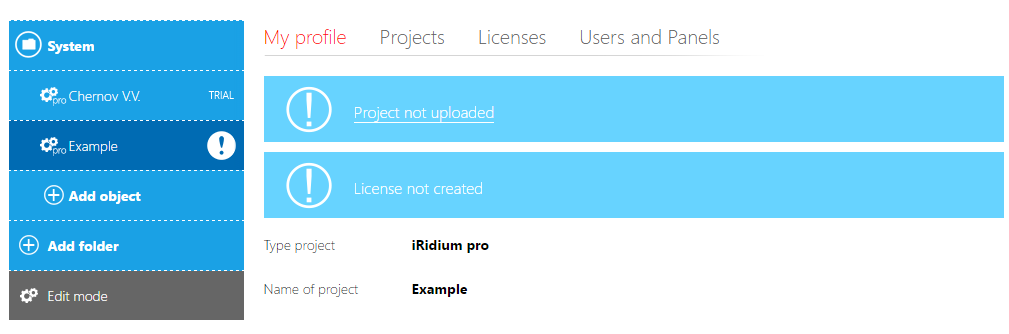
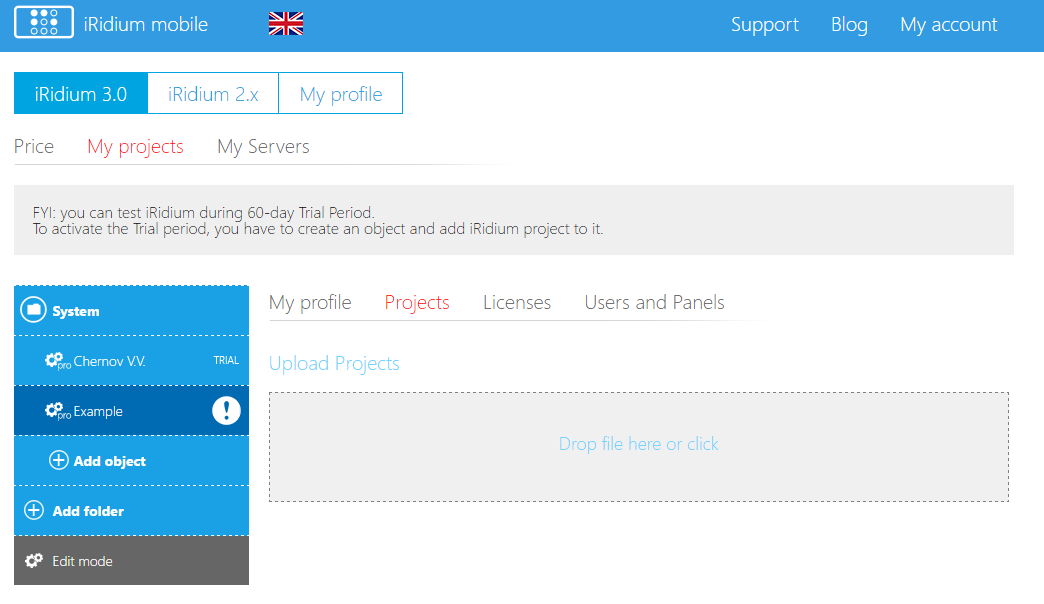
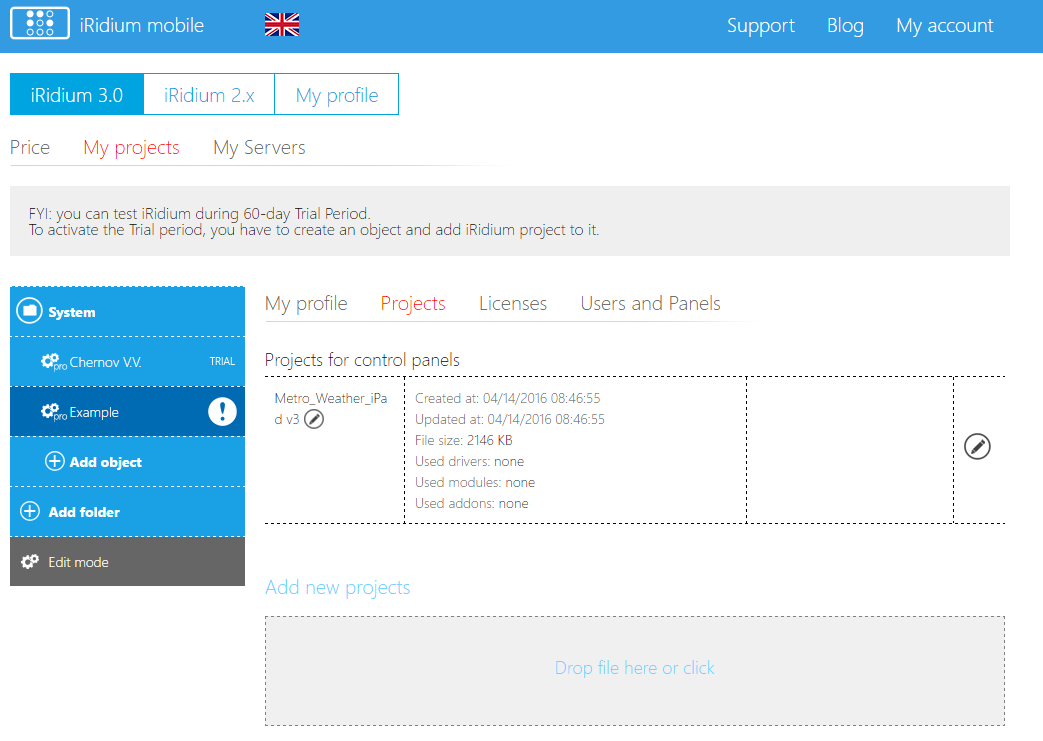
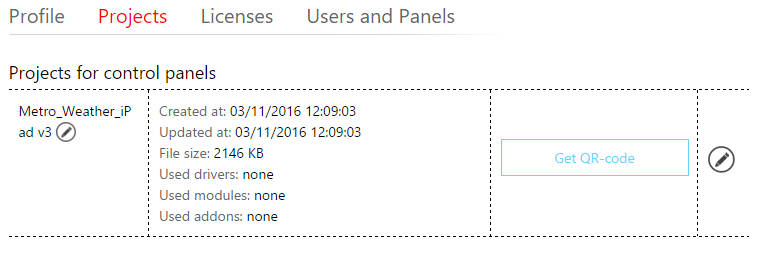
5. Чтобы добавить проект в облако, нажмите на вкладку "Project". Перетащите проекты визуализации (*.irpz) или добавьте их через проводник, нажав на фразу "Drop file here or click"
6. После добавления нажмите на иконку "Finish upload". Проект отобразится в списке
7. Для того, чтобы добавить лицензию, перейдите во вкладку Licences.
7.1. Вы можете активировать бесплатную триал лицензию на 60 дней. Для этого нажмите на соответствующую иконку и подтвердите выбор в появившемся окне.
8. Во вкладке Users and Panels вы можете добавить пользователей, которые смогут скачать ваш проект.
Чтобы загрузить проект из облака, сделайте свайп вправо - откроется меню, нажмите вкладку Cloud и выберите проект
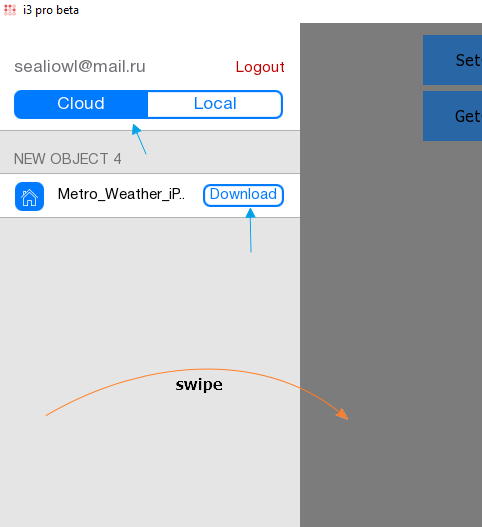
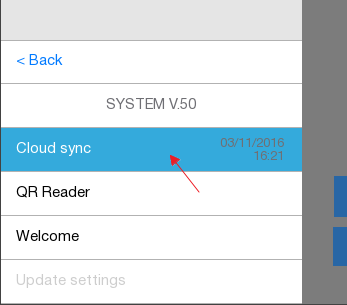
Если проект не отображается, откройте вкладку system
И нажмите на иконку синхронизации
Если вы активировали лицензию, то вы можете считать QR код проекта. Для этого на сайте во вкладке "Project" выберите необходимый проект и напротив него нажмите на иконку "Get QR-code".
Появится QR код. На устройстве в меню нажмите иконку "QR Reader". Включится камера. Наведите камеру на код.
Загрузка проекта конечным пользователем.
На электронную почту пользователя придет сообщение с просьбой создать пароль, а так же с URI ссылкой на загрузку проекта.

Чтобы продолжить регистрацию, нажмите на кнопку "Continue registration". После регистрации вам придёт сообщение с логином и паролем.
Запустите i3 pro на устройстве и введите логин и пароль, как в письме.
С управляющего устройства откройте письмо и пройдите по ссылке "here", чтобы загрузить проект.
Лицензирование
Очень важно загружать не пустой, а уже готовый проект, т.к. при лицензировании учитывается набор драйверов и количество переменных сервера.
Перейдите во вкладку Лицензии и выберите один из вариантов:
- Триальный период - 60 дней непрерывной работы. Позволяет протестировать интерфейс визуализации на любом числе панелей управления ваших пользователей. Продлить триальный период нельзя, по его истечению необходимо приобрести лицензию.
- Создать лицензию, которая работает бессрочно. Бессрочная лицензия требует оплаты в соответствии с выбранным тарифным планом. Доступно несколько лицензий, разделенных по числу панелей управления на объекте, количеству переменных iRidium Server, списку управляемого оборудования. Перед тем, как создать лицензию, максимально точно определите число панелей управления, которые будут управлять объектом автоматизации. Панели управления и драйверы сверх оплаченного списка потребуют доплаты.
На стоимость лицензии влияет:
- число панелей управления, которые должны подключаться к системе автоматизации
- количество управляемых систем автоматизации разного типа (использующих разные драйверы). Управление оборудованием, реализованное разработчиком самостоятельно, с помощью JavaScript в iRidium, требуют подключения платного дополнения "поддержка DDK"
- количество платных дополнений, которые должен поддерживать проект. Например, IP камеры, SIP интерком
- число переменных iRidium Server, доступное для обращения с панелей управления. Это имеет значение только в случае использования сервера. На сервер загружается та же лицензия, что и на панели управления
Customer support service by UserEcho