OnBox Firmware Replacing via Windows OS
Preparation for
OnBox Firmware Replacing
1. Disconnect the OnBox device from the power supply and Ethernet.
2. Take out the SD card from the device .
3. Put the card into the card reader connected to your PC.
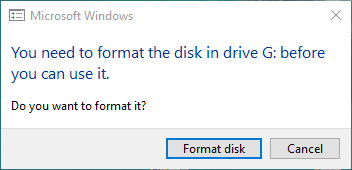
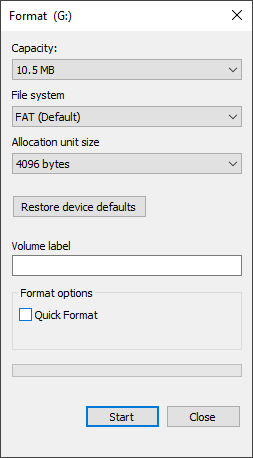
4. Format the SD card
You can download the OnBox system image file here.
You can download the program for installation of the system image file on the SD card here.
OnBox Firmware Replacing
It is recommended to have the folder with the program and the system image file in one catalog.
It is important to follow the following sequence of actions:
1. Start the program for installation of the system image file (it is recommended to do it under the Administrator's rights)
2. Indicate the path to the system image file and to the disk where it will be written.
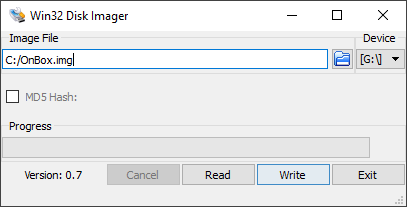
3. Start the process by clicking "Write"
4. After finishing the process take out the SD card from the card reader
5. Put the card into the device
6. Connect the device to the power supply
7. Wait until the indicators on the device light up
8. Connect the device to Ethernet
You updated the OnBox firmware. Now you need to update the server version to the current one: you can download the last setup here.
If the indicators do not light up (see item 7), try to disconnect the device from the power supply, take out the SD card, wait a little and repeat the actions beginning with item 5.
If the device does not work or works incorrectly (for example, cannot be found in the network), try to replace the firmware on the card again.
If the above instructions does not help, then try to replace the firmware on OnBox via Linux OS.
Customer support service by UserEcho